You may use Strato HiDrive as an external storage for team collaboration, internal file-sharing or remote backups. In such cases it can be very useful to establish the secure connection via your corporate UTM Gateway instead on each client. This only requires an additional HiDrive Account which has the ability to connect via VPN (Login allowed via OpenVPN).
This solution requires the HiDrive business plans with advanved protocol featureset!
Step 1 – Download the OpenVPN Config Package#
First of all, you have to download the official openvpn config package directly from the Strato Website. It contains the CA, TLS-Auth Key as well as a poor OpenVPN Config.
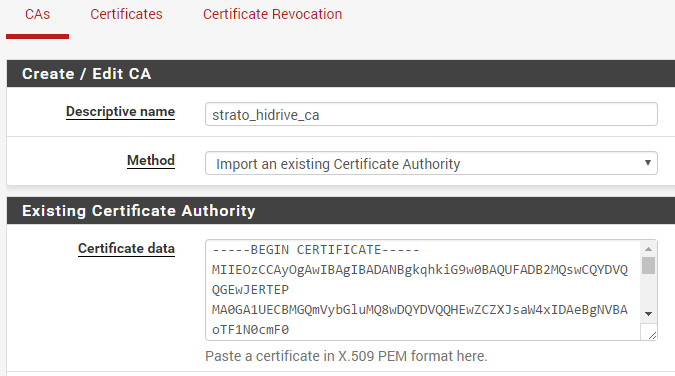
Step 2 – Upload the CA#
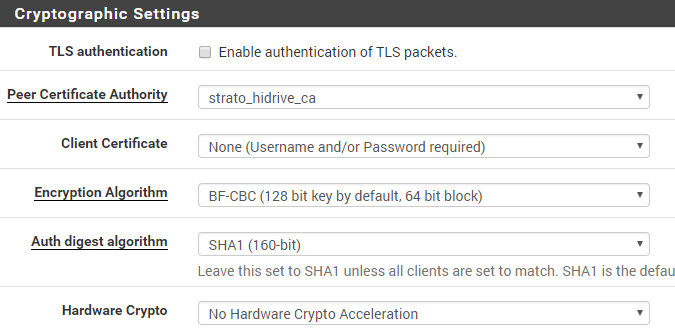
Go into the pfSense Webinterface and add a new CA – paste the content of the ca.drive.strato.com.crt file into the textarea and save it. The CA is now available within the OpenVPN Client config.
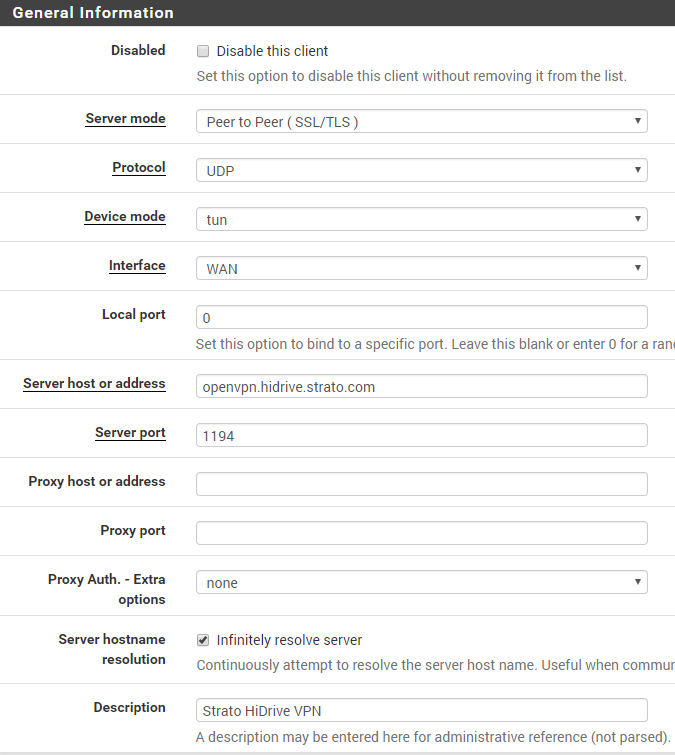
Step 3 – Create a new VPN Client Instance#
Finally goto VPN -> OpenVPN -> Clients and create a new instance.
Connection Settings#
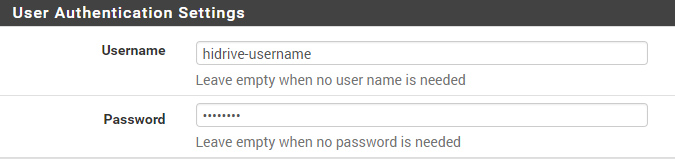
User-Authentication#
You should use a dedicated HiDrive User-Account which has the ability to connect via VPN. Use this account credentials for the OpenVPN User Authentication.
Ciphers#
By default, OpenVPN uses BF-CBC as cipher with SHA1 auth – not AES as set in pfSense GUI.
TLS-Auth#
This is the most tricky/weak part..Strato is using the TLS-Auth Key in bidirectional mode, which is not recommended. Normally the key-direction 0 will be used for servers, 1 for clients and pfSense is not offering an option to change this via the GUI.
But its possible to add the TLS-Auth Key as inline statement under “Advanced Configuration -> Custom Options” without a key-direction (bidirectional by default). Just paste the following code. It contains the TLS-Auth key as of Mai 2017.
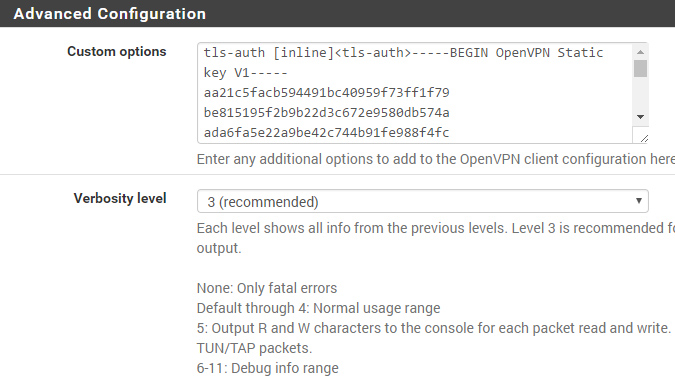
Manual TLS-Auth Config
tls-auth [inline]<tls-auth>-----BEGIN OpenVPN Static key V1-----
aa21c5facb594491bc40959f73ff1f79
be815195f2b9b22d3c672e9580db574a
ada6fa5e22a9be42c744b91fe988f4fc
582480ae85ea00fd59b60757d7cf859d
ceb3ca0f35b0ba9af1947521de78a917
7947ffb55a1fef3d800779fac89d2879
fe9f8fd87a99b1f82561ab9b2e91e5c2
e788f92016f5f47ba1ff158897a26a5c
79f627de5c48a9828c0ca4df34b5ef40
eab016669f28e0c84ed6c7974a12ec19
15a16e213d4a70832c85b59ccc74277f
da3309006c90289f1fca2c726eada188
3a86299a865149b7e178ad6235e1a153
775896594296ff24d2ab63f881021a2b
8a23e100df2153e332c0d0bb555185eb
2da94fd9b2b1b950acd075044607eddf
-----END OpenVPN Static key V1-----</tls-auth>