Howto: Content Navigation/Menu with WordPress
automatically generated navigation including anchors
State of the Art#
There are a several ways how to deal with large content. The most common used method is to split the content in multiple pages, but this completely destroys the usability on tablets, big screens or other mobile devices and frustate your users. Furthermore, each sub-page causes an additional http-request and extra load to your backend application – in case of performance it’s better to deliver the full content within one request. But a large page has one disadvantage: the huge plenty of informations may confuse – therefore your need a navigation element within your page which gives your users a clear view over the content.
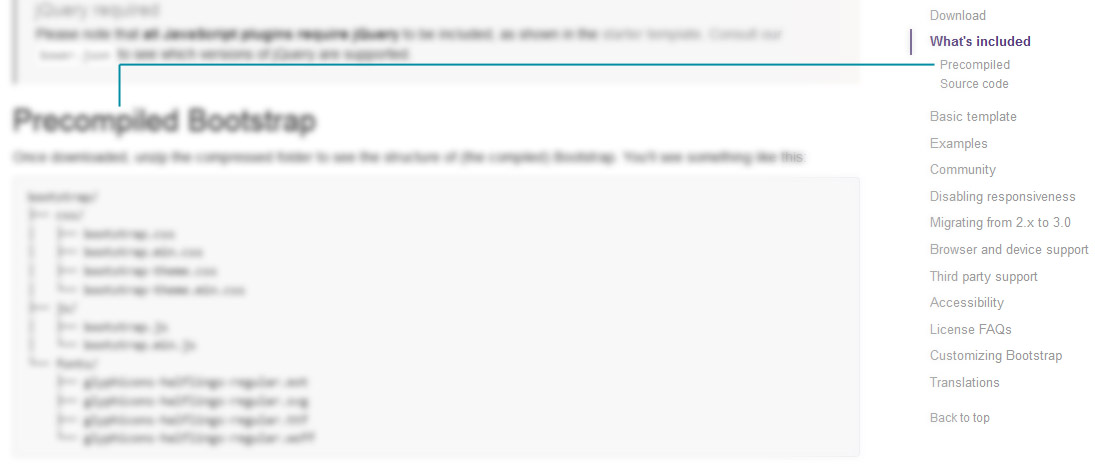
Screenshot: Content Navigation on getbootstrap.com
Examples#
Some popular website using Content-Navigations
- http://getbootstrap.com/css/
- http://modernizr.com/docs/
- http://mootools.net/docs/core/Types/Array
- or take a look on the right side of this page
Challenges#
Adding Anchor Elements#
Generally you can add an id-attribute to each element you want to use as anchor like <h2 id="SuperTitle1">Title</h2> but this causes a problem: the browser will always position the upper boundary of this element to the top of the window. This is not usable when using a top-fixed navigation like on this page. Your headings will always hidden by your top-navigation. As a simple workaround we can add a dummy element before each heading which acts as an invisible anchor. With some tricky CSS it’s virtually positioned “over” the heading with a variable offset which allows you to set an anchor-link-offset to the top the page! Just add the span.anchor css rules to your stylesheet – the ContentMenu class automatically prepends the anchors to each heading for you!
Assumed Content Structure#
<span class="anchor" id="my_first_title_1"></span>
<h2>My First Title</h2>
....
<span class="anchor" id="subheading_2"></span>
<h3>Subheading</h3>
Visually-Hidden Anchors#
span.anchor{
  display: block;
  visibility: hidden;
  position: relative;
  top: -80px;
}
Our Tasks#
A small tasklist to comprehend the following tutorial:
- Find all Headings of the content
- Generate an unique anchor-link for each Heading
- Prepend an anchor element to each Heading
- Create a list based navigation with the given anchor links
Howto#
This tutorial explains step-by-step how to generate the anchors as well as the list based menu with WordPress. It’s possible to use the functionality directly within your Theme (functions.php) or put it into a plugin.
Code Structure#
First of all, we need a function which postprocesses our content and fetches all headings within. WordPress provides an easy method using a filter applied to ‘the_content’. The add_filter method requires a callback function which is executed on calling the_content by your theme. It’s also possible to use filters in class-context! This allows you to create a much more consistent and encapsulated structure and should always prefered!
class ContentMenu{
    function __construct(){
        // add a new postprocessing filter to our content which is executed as last! (priority 9999)
        add_filter('the_content', array($this, 'findHeaders'), 9999, 1);
    }

    public function findHeaders($content){
        return $content;
    }
}
Fetch all Headings#
To fetch all headings of our content, we use the Regular-Expression '/<h([1-6])(.*)?>(.*)<\/h[1-6]>/Uu' in our callback-function. To process the results and prepend the required anchor-elements to the headings the preg_replace_callback function is used, which executes the given callback for each match.
/**
  * Search for all Headers h1-h6 within the_content
  * @param String $content
  */
public function findHeaders($content){
    return preg_replace_callback('/<h([1-6])(.*)?>(.*)<\/h[1-6]>/Uu', array($this, 'findAnchorsCallback'), $content);
}
Process Headings#
For further processing (generating the list menu) we have to store all fetched headings into a local storage. To avoid naming conflicts – maybe a header is used multiple times – a unique-id is added to each anchor. We have also define the heading-levels we want to use. This can also be achieved by modifing the Regular-Expression but this solution allows you to add anchors to every heading and use only the specified ones to generate the menu list!
Class Variables#
// Content Item Storage
private $_contentMenuElements = array();

// Headings used to generate the content menu
private $_validHeadings = array(2,3);

// Anchor Counter - used to generate uniqueID !
private $_anchorCounter = 0;
Processing#
Each time the callback is executed, the $_anchorCounter is incremented – it is used to add an unique part to each anchor name! The anchor-name itself is generated from the heading text with all special chars replaced by an underscore. e.g. “My Custom’ Title” becomes “my_custom_title_23” – you can modify it in any way you want! If the heading-level is in the $_validHeadings list, the heading (including the anchor’s name as well as the level) is pushed to $_contentMenuElements array. Finally the “invisible” anchor-element ist prepended to the heading element which is available within $matches[0] (full matched expression). The CSS-class “anchor” is used to apply the “invisible” style.
    /**
     * Generate Anchor and store Anchor-Name for further processing
     * @param unknown $matches
     * @return string
     */
    public function findAnchorsCallback($matches){
        // increment anchor counter
        $this->_anchorCounter++;

        // generate anchor name
        $anchorName = preg_replace('/[^a-z]+/u', '_', strtolower($matches[3])).'_'.$this->_anchorCounter;

        // store anchor
        if (in_array(intval($matches[1]), $this->_validHeadings)){
            $this->_contentMenuElements[] = array(
                    'level' => intval($matches[1]),
                    'anchor' => $anchorName,
                    'title' => $matches[3]
            );
        }

        // add anchor tag before
        return '<span class="anchor" id="'.$anchorName.'"></span>'.trim($matches[0]);
    }
Generating the List-Menu#
This part is not real magic but it requires some work to get in run. This is basically an algorithm which converts a linear data-structure in a tree structure. It’s based on the calculation of the level differences between the current and previous item. It outputs a simple nested list-menu.
    /**
     * Generate Content-Menu based on traced headings within the_content
     */
    public function getContentMenu(){
        // navi elements available ?
        if (count($this->_contentMenuElements)==0){
            return;
        }

        // get current level
        $firstElement = array_shift($this->_contentMenuElements);
        $currentLevel = $firstElement['level'];

        // generate startup structure / first element
        for ($i=0;$i<($currentLevel-1);$i++){
            echo '<ul><li>';
        }
        echo '<a href="#', $firstElement['anchor'], '">', $firstElement["title"], '</a>';

        foreach ($this->_contentMenuElements as $element){
            // same level ?
            if ($currentLevel == $element['level']){
                echo '</li><li><a href="#', $element['anchor'], '">', $element["title"], '</a>', "\n";

            // higher level
            }else if ($currentLevel > $element['level']){
                // close structures
                for ($i=0;$i<($currentLevel-$element['level']);$i++){
                    echo '</li></ul>';
                }

                // create node
                echo '</li><li><a href="#', $element['anchor'], '">', $element["title"], '</a>', "\n";

            // lower level
            }else{
                // generate startup structure / first element
                for ($i=0;$i<($element['level']-$currentLevel);$i++){
                    echo '<ul><li>';
                }

                // create node
                echo '<a href="#', $element['anchor'], '">', $element["title"], '</a>', "\n";
            }

            // store current elements level
            $currentLevel = $element['level'];
        }

        // close structure
        for ($i=0;$i<($currentLevel-1);$i++){
            echo '</li></ul>';
        }
    }
Adding Singleton Pattern#
In the functional world of WordPress, the pure OÒP style is hard to use. As a little workaround we add a singleton pattern to our class which allows the use of static calls without the need of an explicit created instance (internal handled by the class). This pattern is used in all of my WordPress plugins!
    /**
     * Static call the getContentMenu method and output the content
     */
    public static function theContentMenu(){
        echo self::$__instance->getContentMenu();
    }

    // singleton instance
    private static $__instance;

    // get singelton instance
    public static function getInstance(){
        // check if singelton instance is avaible
        if (self::$__instance==null){
            // create new instance if not
            self::$__instance = new self();
        }
        return self::$__instance;
    }
Theme Integration#
Finally, download the complete PHP file (ContentMenu.php – see Attachments) and copy it into your Themes’ directory. And don’t forget to add the special anchor-css if needed!
Functions.php#
Within your functions.php add the following lines to load/initialize the ContentMenu.
// content menu
require_once('ContentMenu.php');

// initialize content menu handler
ContentMenu::getInstance();
Template Files#
To display the menu, you have to call the ContentMenu::theContentMenu(); method within your theme files e.g. single.php or page.php – Important Notice: the the_content() method has to be called before! Otherwise the menu will appear empty because no content is available which can be analyzed.
<div class="row">
  <div class="col-md-10 contentWrapper">
     <div class="contentarea">
         <?php the_content(); ?>
     </div>
  </div>
  <div class="col-md-2 sidebarWrapper">
     <div id="contentnavi">
         <?php ContentMenu::theContentMenu(); ?>
     </div>
  </div>
</div>
Workaround#
If you Theme requires the menu output before the_content() you can use get_the_content() and store it locally. But pay attention – get_the_content() will not apply any filters to the content – this have to be done manually!
<div class="row">
  <div class="col-md-2 sidebarWrapper">
     <div id="contentnavi">
         <?php
           $content = apply_filters('the_content',get_the_content());
           ContentMenu::theContentMenu(); ?>
     </div>
  </div>
  <div class="col-md-10 contentWrapper">
     <div class="contentarea"><?php echo $content; ?></div>
  </div>
</div>
Additional Feature#
Maybe you like the Fixed-Scroll-Navigation seen on a several pages. It’s very easy to implement and you can also add features like ScrollSpy.